メールソフトThunderbird(サンダーバード)のアドオンの作り方を学んだのでメモ。
確認環境
- Windows7 64bit
- Thunderbird 2.0.24
Thunderbird開発元のMoziilaに入門記事(英語)がある。
https://developer.mozilla.org/en/Building_a_Thunderbird_extension
この記事の通りにやってみたら作成できた。
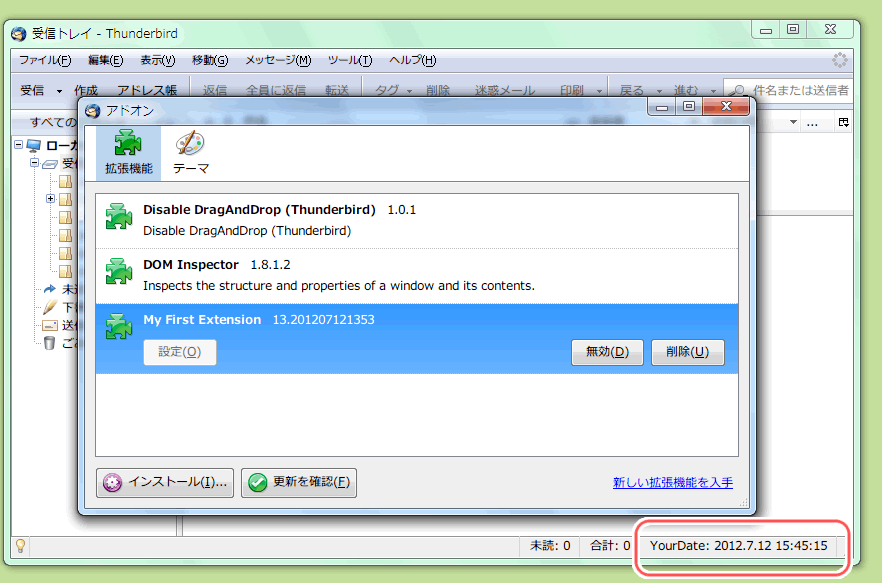
以下、その記事の1ページごとに解説する。
1: introduction
このページは、
これからどんな手順でアドオンを作るか‥‥という説明。
「“Add-on Builder”というWeb上の開発環境に登録するといいかも!」と書いてあるが、登録する必要は無かった。
2: extension file layout
ファイル配置について書いてあるが、最小限にした場合、以下で動いた。テキストファイルを4つ作るだけですね。
myfirstext/
    /install.rdf
    /chrome.manifest
    /chrome/
    /chrome/content/
    /chrome/content/myhelloworld.xul
    /chrome/content/overlay.js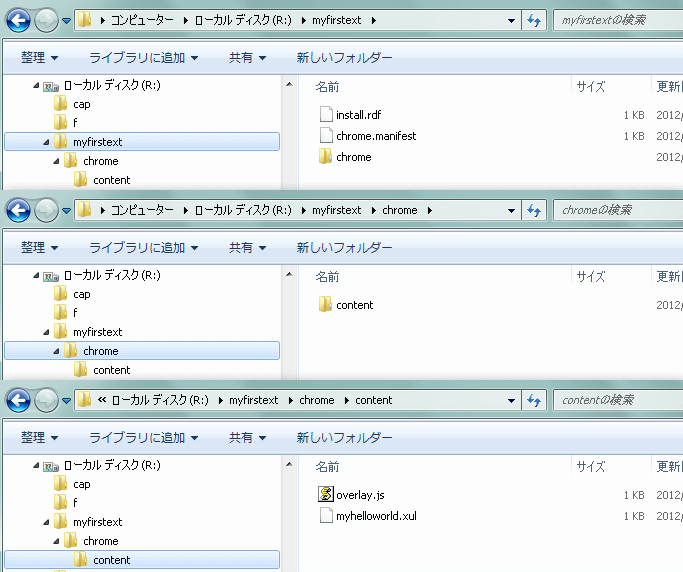
3: install manifest
install.rdf というテキストファイルを新規作成する。
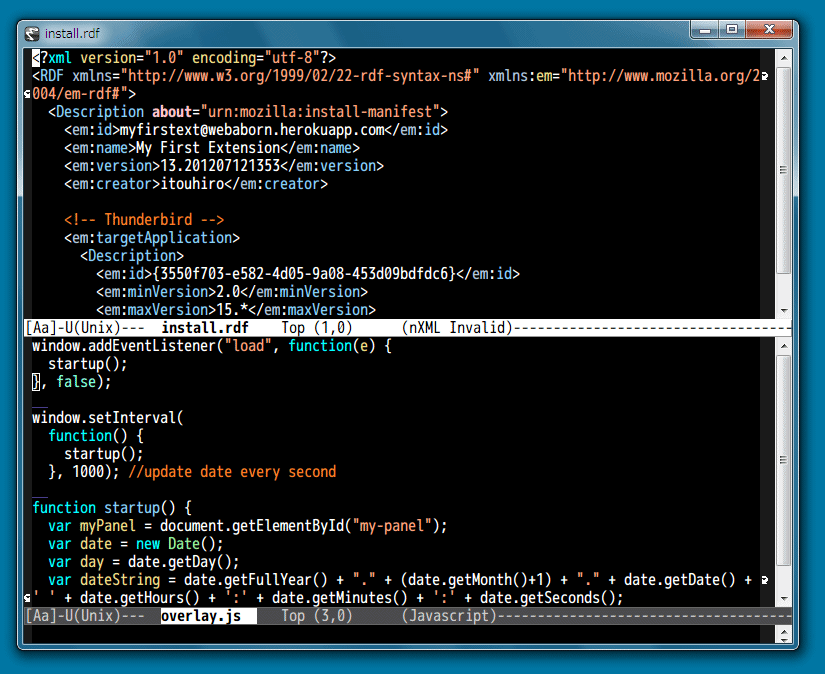
install.rdf
<?xml version="1.0" encoding="utf-8"?>
<RDF xmlns="http://www.w3.org/1999/02/22-rdf-syntax-ns#" xmlns:em="http://www.mozilla.org/2004/em-rdf#">
  <Description about="urn:mozilla:install-manifest">
    <em:id>myfirstext@webaborn.herokuapp.com</em:id>
    <em:name>My First Extension</em:name>
    <em:version>13.201207121353</em:version>
    <em:creator>itouhiro</em:creator>

    <!-- Thunderbird -->
    <em:targetApplication>
      <Description>
        <em:id>{3550f703-e582-4d05-9a08-453d09bdfdc6}</em:id>
        <em:minVersion>2.0</em:minVersion>
        <em:maxVersion>15.*</em:maxVersion>
      </Description>
    </em:targetApplication>
  </Description>
</RDF>
em:id は
- メールアドレス形式だがメールアドレスではない。
- aaaaa @ bbbbb という3つの部分にわかれていて、
- aaaaaの部分はアドオンの名前を短くしたもの。必ずすべて英小文字にする。
- bbbbbの部分はあなたのWebサイトのtop level domain、たとえばこのブログだと itouhiro.hatenablog.com となる。
em:name はThunderbirdのアドオンウィンドウに表示される、アドオン名。
em:versionはアドオンのバージョン。新バージョンをリリースするたびに更新すること。
em:creatorは作者の名前。この項目はなくてもよい。
em:targetApplication以下のem:idは、このアドオンはどのソフトで動くか、を示す。いまはThunderbirdのアドオン作ってるので、Thundirbirdを指定する。
https://addons.mozilla.org/en-US/firefox/pages/appversions/
のThundirbirdの GUID を指定すればいい。
em:minVersionとem:maxVersionは、このアドオンが動作するThundirbirdのバージョンの下限と上限を指定する。ここで指定できるバージョンは、さきほどのページ
https://addons.mozilla.org/en-US/firefox/pages/appversions/
にあるバージョン文字列から選ぶ。
下限は、今回Thundirbird 2.0.24で動作させるので2.0。上限はいちばん上にしておけばいいだろう。
4: chrome manifest
chrome.manifest というテキストファイルを新規作成する。
chrome.manifest
content     myfirstext    chrome/content/
overlay chrome://messenger/content/messenger.xul chrome://myfirstext/content/myhelloworld.xul
1行目の myfirstext というのは、install.rdfのem:idのaaaaaの部分に書いた文字列と同じにする。
5: XUL
DOM Inspector https://addons.mozilla.org/en-US/thunderbird/addon/dom-inspector/ というアドオンいれると便利、と書いてあるけど今回は使わない。
chromeフォルダの下の、contentフォルダの下に、myhelloworld.xul というテキストファイルを新規作成する。
myhelloworld.xul
<?xml version="1.0"?>
<overlay id="sample" xmlns="http://www.mozilla.org/keymaster/gatekeeper/there.is.only.xul">
 <script type="application/javascript" src="chrome://myfirstext/content/overlay.js"/>
 <statusbar id="status-bar">
  <statusbarpanel id="my-panel" label="Date"/>
 </statusbar>
</overlay>
6: Adding JavaScript
chromeフォルダの下の、contentフォルダの下に、overlay.js というテキストファイルを新規作成する。
overlay.js
window.addEventListener("load", function(e) {
  startup();
}, false);

window.setInterval(
  function() {
    startup();
  }, 1000); //update date every second

function startup() {
  var myPanel = document.getElementById("my-panel");
  var date = new Date();
  var day = date.getDay();
  var dateString = date.getFullYear() + "." + (date.getMonth()+1) + "." + date.getDate() + ' ' + date.getHours() + ':' + date.getMinutes() + ':' + date.getSeconds();
    myPanel.label = "YourDate: " + dateString;
}
8: packaging
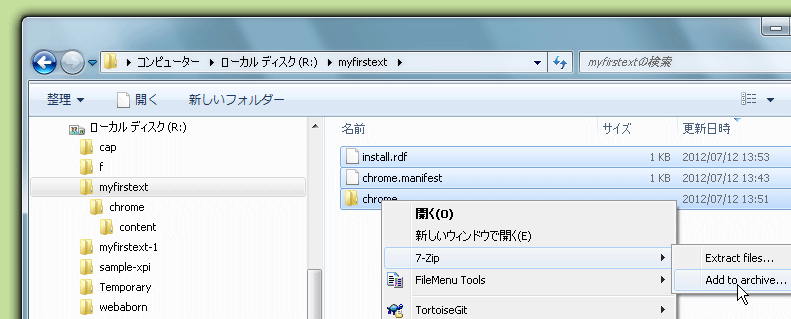
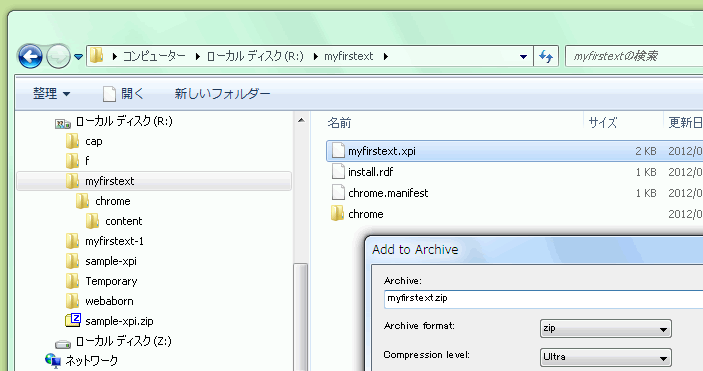
xpiファイルを作って、Thundirbirdにインストールする。
xpiファイルは単なるzipファイルなので、zipアーカイブ作成ソフトを使う。ここでは 7-zip を使用した。
Thundirbirdの[ツール-アドオン]ダイアログで、
- [インストール]ボタンを押してxpiファイルを選ぶ。または
- xpiファイルをドラッグ&ドロップ。
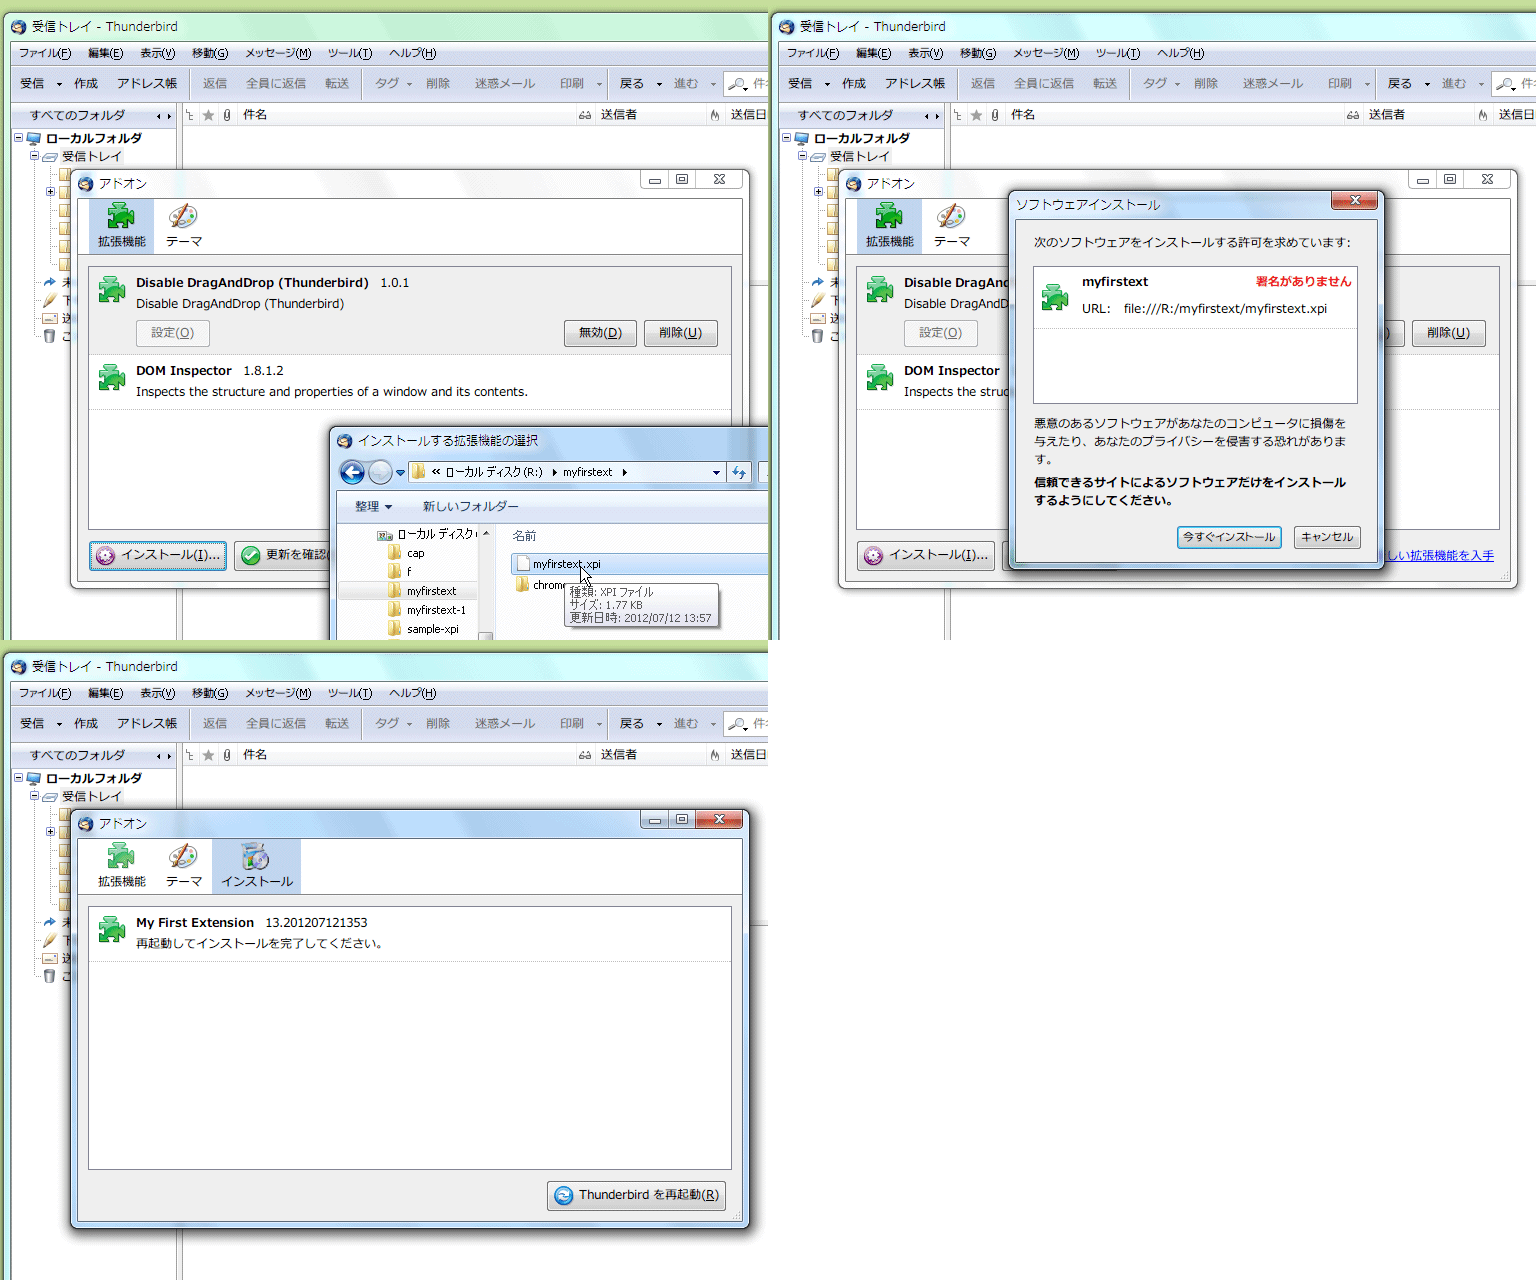
これでインストール完了。

7: Installation
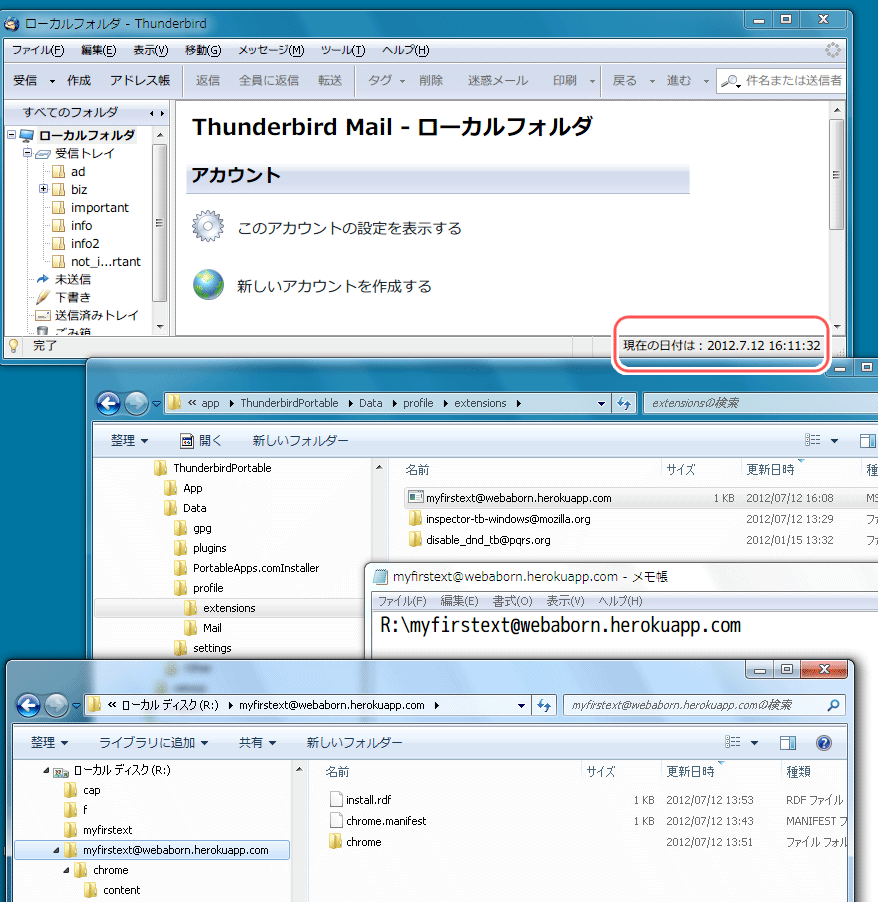
xpi作ってインストールしなくても、extensionフォルダーにファイルを設置して、動作確認できる。
Windows版のThundirbirdPortable 2.0.24の場合、
ThunderbirdPortable\Data\profile\extensions の下に
- 「install.rdfのem:id文字列」のテキストファイルを作成して、それに1行だけFullPathを書く。参照先のフォルダ名も「install.rdfのem:id文字列」と同じにする。
- 「install.rdfのem:id文字列」のフォルダを作成して、そこに先ほどのファイル配置して、開発する。
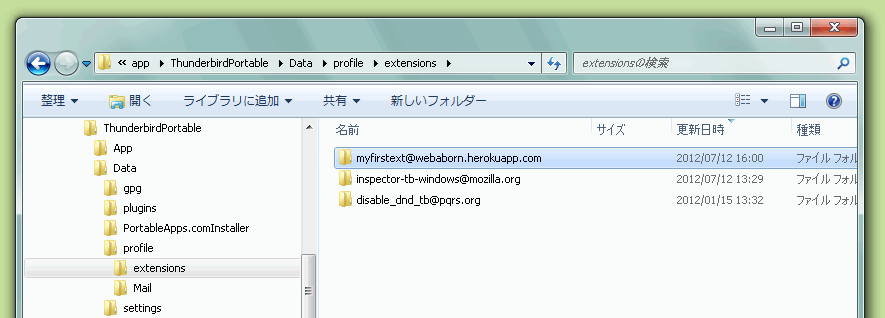
1番めがオススメの開発方法らしい。
また、開発するときはメールデータ消えたりしても問題ないように、Thunderbirdのデータをバックアップしておくことが推奨されている。
Thunderbirdのポータブル版だと、'ThundirbirdPortable'フォルダ1つバックアップすれば実行ファイルとメールデータすべてバックアップできてしまいラクなので皆にもオススメしたい。

Firefox Hacks Rebooted ―Mozillaテクノロジ徹底活用テクニック
- 作者: 浅井智也,池田譲治,小山田昌史,五味渕大賀,下田洋志,寺田真,松澤太郎
- 出版社/メーカー: オライリージャパン
- 発売日: 2011/10/26
- メディア: 単行本(ソフトカバー)
- クリック: 56回
- この商品を含むブログ (11件) を見る